Showing posts with label Following the Paper Trail. Show all posts

Tuesday, October 15, 2013

Simple Treasures Journal Mini Album Part 4


In the weeks while I was
working on this album, I wondered if I would ever finish. Now that it's complete, am writing these posts and remembering how much fun it was to participate in Laura's classes and how much I truly enjoyed the experience. It's something I'll want to try again, for sure!!!
So... let's get right into
these pages... and while doing so, I can relive some of those pleasant times in my memory.

page fourteen

This is a first. I only took
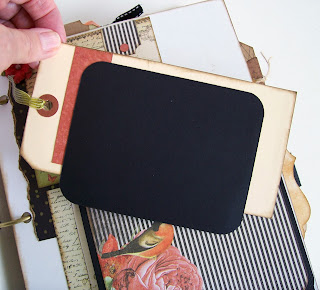
 one photo of this page and yet it's at the top part of the list of my favorites. This photo just doesn't do the colors justice. These papers are SO gorgeous. Two simple tags made into pockets with Prima Printables Notecards inserted (again in the natural uncolored state).

page fifteen


All three of these mats are
hinged and flip back to to expose the back side for more photo space or journaling.


Here is the correct order.
Again, I'm overwhelmed at how beautiful this Kaisercraft Curiosity collection is.

page sixteen

This pocket/flap is made
with a plain white envelope. I believe Laura used one in kraft. After searching through my stash, I couldn't find one in the right size, so I opted for white.


This is the first mat
tucked into the front portion of the envelope...


flip it back, and you
have two more mats. The top of the envelope forms a pocket that contains a large tag...


and inside the envelope
there is one final mat. Once you start putting these together, it's rather an amusement to see how many different options for pocket placement you can create.
Just a couple more
pages to go... I hope you'll be back tomorrow for the finale... then I'll move on to my next project. 

Thanks for stopping by!
Linda

Monday, October 14, 2013

Simple Treasures Journal Mini Album Part 3


This post is a continuation
of a five part series on a mini album I recently made following Laura Denison's Ustream videos at
For those of you who
would enjoy making a mini album for the coming holidays, Laura has a Christmas version of this same journal mini album. She had a complete kit available, but she sells out rather quickly. You can check it out on her blog here or her store here. As I said previously, I used my own stash since I had most of the same materials already on hand. (Hummm... I wonder if that means I buy too much!) 

Here is today's installment...

page ten

This page is one that
I made myself using watercolor paper. I cut it 5 1/2" instead of the 7" which is the size of those that came in the Prima Mixed Media Album kit (and the width of Laura's Vintage Vanity Album). I forgot to mention on the previous posts that pages three/four and nine were also of the watercolor paper and the smaller size.


Side pocket with mat.


Front tri-fold mat.


Tons of real estate
for photos... you can get two 5 x 7" on these if you wish or several smaller sizes.

page eleven

Front pocket with a mat.


With the front mat removed,
you can see the side mat that slips into the pocket formed by the semi-transparent bag. I was actually able to put on two of those bags since my pages were larger than Laura's original ones. We created our own tags following her basic instructions.

page twelve

Side pocket with mat.


Front slit-pocket with mat 
created with Prima Printables Notecard. Laura did a segment of coloring techniques for the Printables, but I liked mine in the natural color. To each his own, right?


Flap under the Printable mat.

page thirteen

This page features one
of Laura's ingenious ideas using Prima packaging. This front flap is a repurposed partial piece of a Finnabair Elements package.


On the back of the flap
is a coin envelope pocket with tag. The back part of the packaging forms another pocket. Again... lots of real estate!!!
That's all for today, friends!

Thanks for stopping by!
Linda

Friday, October 11, 2013

Simple Treasures Journal Mini Album


Hi friends!
Well, after following the paper trail with Laura this last month, I've finally completed her Simple Treasures Journal Mini Album. What an adventure it was... and I'd do it again (and probably will many times) without any hesitation. I can say without a doubt, this is my absolute favorite album I've made to date. It was a ball following along with Laura and those on the chat (even though I didn't join in)... I felt as though I were right there with her getting all the benefit of her experience. LOVED it!!!
Now about my album.
I didn't purchase her kit as I already had most of what she was using. The only big difference was the size of my album covers. I had Prima's 7 x 9" mixed media album which is resist canvas plus the Prima M M A kit, while Laura was using the new Prima Vintage Vanity Spiral Bound Art Journal sized at 5.5 x 7.5". Needless to say, I had some slight changes to make on my pages. 
I took 107 photos of
this puppy. Not to worry... I'll not post them all... and I'll spread this out over several days so I don't totally drive you away. 
I do hope you'll go to
Laura's blog and check out her PDF's of her album and watch her series of videos on the making here. Tons of inspiration there, friends!


The key and key hole
are Staples by Graphic 45; the border was cut with Alterations Torn Notebook; the ticket is Idea-ology; the flower with the round gold center in the right upper corner as well as the tiny blooms and smaller red dahlias are all from Petaloo; the flat dark red bloom at the bottom right is by Recollections.


These two ruffled
flowers along with that flat dark red one were together in a package by Recollections. I bought several packs of those at half price when Michaels first put out their fall goodies. They're gorgeous... not like the usual Recollections I've bought in the past. You may want to check these out if you're in the market for some fall blooms.


The metal corner piece
is by Momenta; The die cuts are from the Kaisercraft Curiosity Collectable Die Cuts pack; the patterned paper is from Kaisercraft's Curiosity 6.5" paper pad; the Distress ink is Vintage Photo.


I really liked the cover a
light color so I just gave it a light misting with Lindy's Stamp Gang's Clam Bake Beige Starburst then sponged on Antique Linen DI at the edges.
Well, at this rate, I'll be
writing posts on this album for the rest of the year... so from here on there won't be a lot of detail. If you have any questions about the techniques or products, please e-mail me or leave a comment.

page one

Pocket at the top...
tag inside is double sided for photos.


page two


 I'll end here for today.
I hope you'll come back for more and that I haven't bored you to death.

Thanks for stopping by!
Linda

Tuesday, July 16, 2013

Dress It Up At CCCB

This is my final
project for my spot as Guest Designer at City Crafter Challenge Blog. What a pleasure working with Kirsty, Ros, Charlene and Wendy. I've loved it, ladies... thank you from the bottom of my heart!
Ros is up as hostess
this week and has an exciting challenge for us that had me searching my home for something to decorate. She wants us to take an ordinary item (e.g. a tin, envelope, peg, jar, etc.) and "Dress It Up"!


Back to me searching
my home for an item... I opened a cabinet in the kitchen and saw...


ahh haaa... 
I don't see a box... I see an album cover!!!!
This is what I did...


I had to trim some
of the box away, gave it a quick coat of gesso and glued down some papers from Prima's Nature Garden collection.


I covered the spine
with a piece of natural canvas...


and did a modified
"stack the deck" (Laura of Following the Paper Trail) for my pages.


I added a Prima
flower and two from Petaloo. The butterfly is fussy cut from a sheet from Graphic 45.


The gems are Prima's
Say It In Crystals and my title was cut from the one of the papers.


The lace is from Surplus City.


I punched a hole
in the back cover, added a wide eyelet from We R Memory Keepers, threaded in some colored seam binding and tied on a hinge clip, jump ring and pearls from Idea-ology for my closure.


I made faux envelope
pages and covered them with the NG papers. Each page has a pocket end and holds a double sided photo mat with a tab (tubs cut with Alterations Tiny Tabs & Tags die).


When I said a modified
stack the deck... I meant that I only did five fins for pages instead of the usual six as I wanted a wide space in between each page.


I hope this will
give you some ideas for what you can do with an ordinary food packaging box.


I didn't stop here though.
I went ahead and decorated the inside with a multitude of additional pockets, tags and photo spots. Please stop back and I'll show you the finished project.
Now, hop over to see
the gorgeous things the CCCB Design Team ladies have made. And again... thank you so very much CCCB for giving me the opportunity to be a part of your challenges. I've loved every minute!

Thanks for stopping by!
Linda
Related Posts Plugin for WordPress, Blogger...