Showing posts with label City Crafter Challenge Blog. Show all posts

Sunday, September 27, 2015

My Favorite For Fall


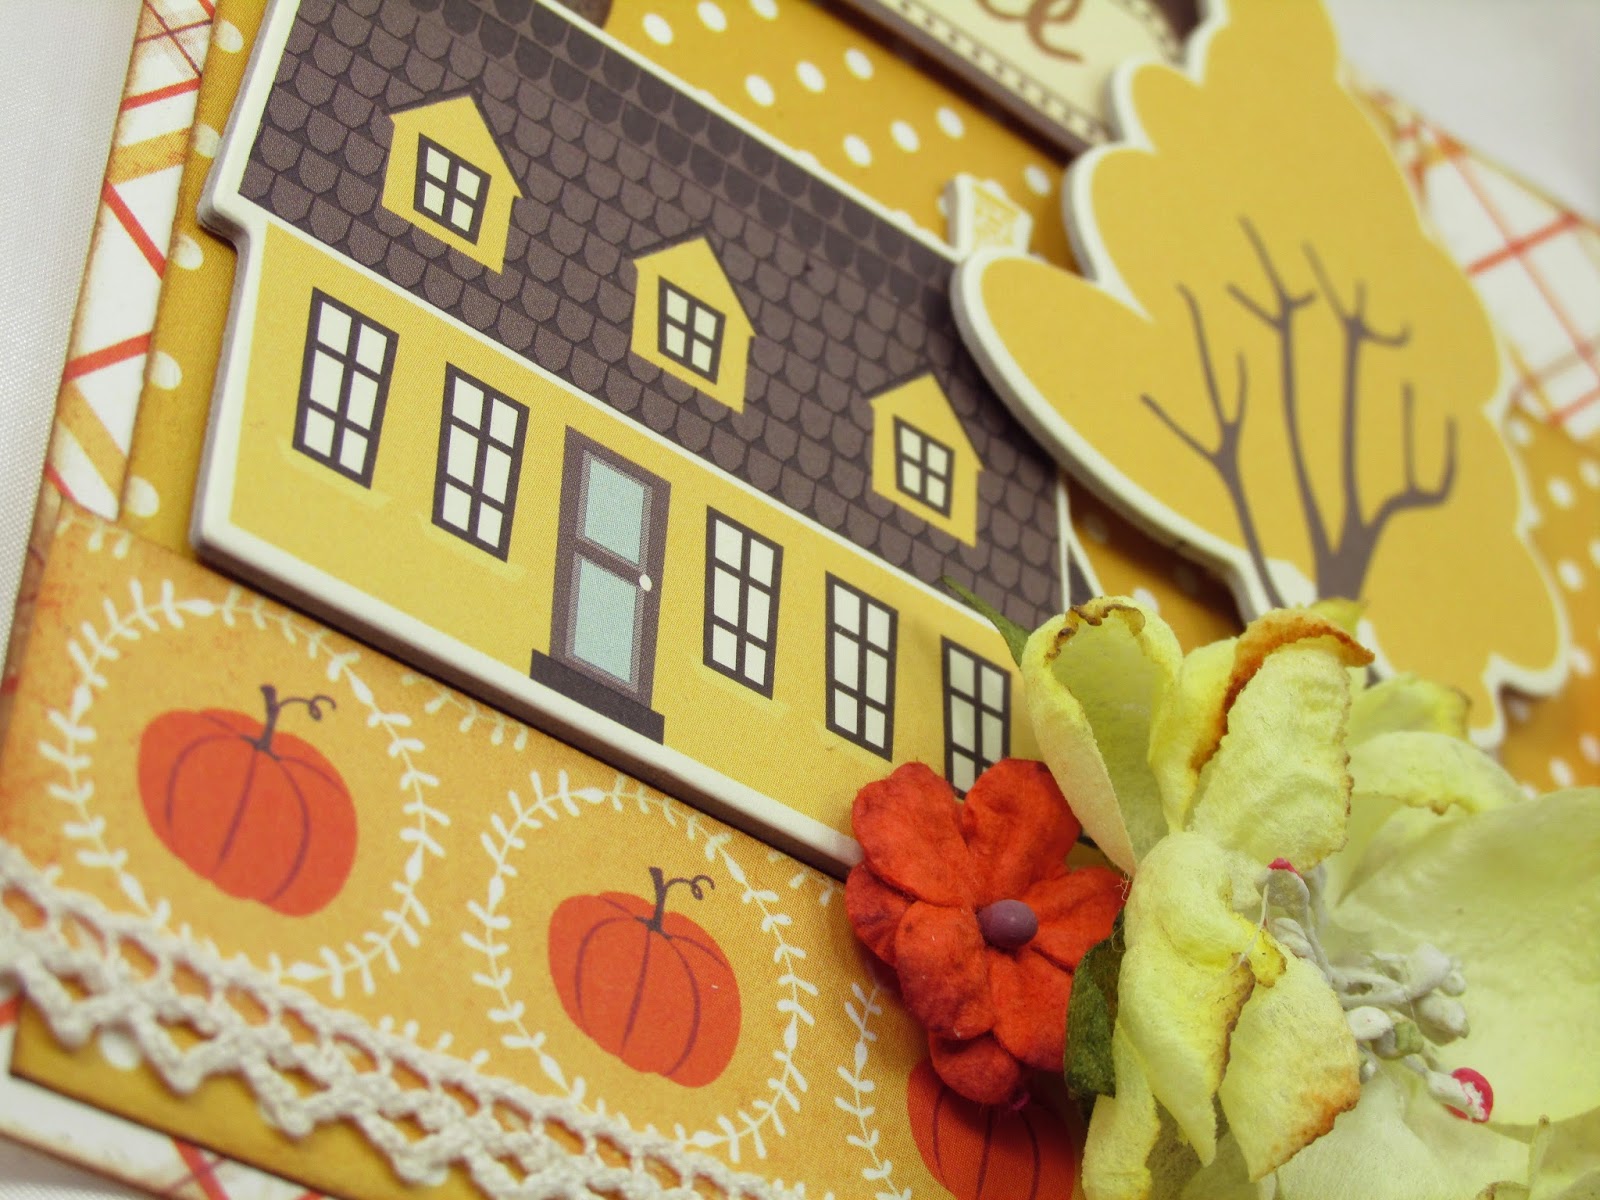
This is my favorite design of the fall cards I've created so far this season. It's a fairly simple mix of patterns and layers. The polka dot paper is an Echo Park Dots & Stripes and the base is one from Tim Coffey by K & Company.


A Prima Serenity in a brown tone with a bed of cheesecloth.


A layer of kraft Canvas Corp Flute (corrugate) and one of my treasured wood keys from Tennessee.


Hand dyed wool leaves cut with Alterations Mini Tattered Leaves die set. A Webster's Pages chipboard button (from a Pixie Dust kit)  and a scrap of ribbon from my stash.


These golden yellow flowers are vintage Prima, and beneath it is a Sizzix Vintage Doily.


The girl image was cut from a sheet of Graphic 45's An Eerie Tale and under it is a cut from my Kaiserkraft 6.5" Vintage Timeless paper pad.

I'm linking up at:
City Crafter Challenge Blog - Fall Has Arrived
Verve Inspiration Challenge - Autumn Lovelies

Thanks for stopping by, and have a wonderful Sunday!
Linda

Thursday, September 24, 2015

The Story of Fall Pocket Card


Going through my stash, I came across a bunch of October Afternoon embellishments I had forgotten about. These chipboard pieces are from their Farmhouse collection. I can't for the life of me understand why I hadn't used these... they're so adorable and lend themselves perfectly to a fall theme. I mixed them with my Echo Park The Story of Fall papers.


A wood key from my favorite wood shop in Gatlinburg, Tn.


A Petaloo Botanica and some brown embroidered leaves... which came from Surplus City in Lavale MD. I'm hoping to be able to make a stop there in a couple weeks when we head back home from New England.


The ecru cotton crocheted lace is also a Surplus City item. The tiny yellow and orange blooms and leaves are Petaloo Darjeeling Petites.


The teeny golden rhinestone is from BoBunny. The piece of ephemera I stamped with Fall, is from the Farmhouse Miscellany. The frame underneath was cut with Sizzix Frame die.

I'm linking up at:
City Crafter Challenge Blog - Fall Has Arrived

The Penmaker and I will be heading out soon for a fall excursion, but I have some creations scheduled to show you. Please don't forget me.

I really appreciate you stopping by!
Linda

Monday, December 16, 2013

Christmas Tags


I've been working steadily
on tags for the past few days and still haven't filled my quota. Most of this lot are made with Graphic 45 papers and the odds and ends laying on my desk.

I'm linking up at:
City Crafter Challenge - Jingle Bells

Have a beautiful Monday!

Thanks for stopping by!
Linda

Tuesday, July 16, 2013

Dress It Up At CCCB

This is my final
project for my spot as Guest Designer at City Crafter Challenge Blog. What a pleasure working with Kirsty, Ros, Charlene and Wendy. I've loved it, ladies... thank you from the bottom of my heart!
Ros is up as hostess
this week and has an exciting challenge for us that had me searching my home for something to decorate. She wants us to take an ordinary item (e.g. a tin, envelope, peg, jar, etc.) and "Dress It Up"!


Back to me searching
my home for an item... I opened a cabinet in the kitchen and saw...


ahh haaa... 
I don't see a box... I see an album cover!!!!
This is what I did...


I had to trim some
of the box away, gave it a quick coat of gesso and glued down some papers from Prima's Nature Garden collection.


I covered the spine
with a piece of natural canvas...


and did a modified
"stack the deck" (Laura of Following the Paper Trail) for my pages.


I added a Prima
flower and two from Petaloo. The butterfly is fussy cut from a sheet from Graphic 45.


The gems are Prima's
Say It In Crystals and my title was cut from the one of the papers.


The lace is from Surplus City.


I punched a hole
in the back cover, added a wide eyelet from We R Memory Keepers, threaded in some colored seam binding and tied on a hinge clip, jump ring and pearls from Idea-ology for my closure.


I made faux envelope
pages and covered them with the NG papers. Each page has a pocket end and holds a double sided photo mat with a tab (tubs cut with Alterations Tiny Tabs & Tags die).


When I said a modified
stack the deck... I meant that I only did five fins for pages instead of the usual six as I wanted a wide space in between each page.


I hope this will
give you some ideas for what you can do with an ordinary food packaging box.


I didn't stop here though.
I went ahead and decorated the inside with a multitude of additional pockets, tags and photo spots. Please stop back and I'll show you the finished project.
Now, hop over to see
the gorgeous things the CCCB Design Team ladies have made. And again... thank you so very much CCCB for giving me the opportunity to be a part of your challenges. I've loved every minute!

Thanks for stopping by!
Linda

Tuesday, June 4, 2013

Happy Mail And A Masculine Card

Our sweet Ros, 
aka Mikey's Mom, and I did a swap of supplies that we were both having trouble obtaining. The product she sent me, arrived yesterday along with this gorgeous card. This is going to sit right here on my desk, among these scraps, bottle caps, notes and wilting flowers, as my inspiration. Hopefully some of her talent will rub off onto me and my projects. Be sure to check out her blog if you haven't been there... lots of beautiful projects for you to see, like the fabulous necklace she did today for the City Crafter challenge blog.
Thank you, dear friend!


I'm still playing around
with DCWV Timeless Type and Kaisercraft Timeless papers in combination. These two work together so beautifully. Today I have a masculine card to show you...


This is on a black textured 
cardstock base with white textured mats. 


All these tags, banners
and labels are from the DCWV 8x8 inch stack. All are edged with Black Soot Distress Ink. As I normally do... I left the card front blank for a suitable sentiment when I give it away. I did a little machine stitching for more interest.
The gold pearl brads 
are from My Mind's Eye, and I used another of my son's soda bottle caps. This one has a button center tied with May Arts natural burlap string.


The banner is topped
with tiny buttons from my stash and more MA burlap string bows.
Tomorrow I'm going
to my daughter's to do some scrappin' with my granddaughter, Katie. We are planning on making a paper bag mini album and maybe a card, too! She is really into creating, and at nine years old, I want to help keep that flame burning.
Have a grand Tuesday!

Thanks for stopping by!
Linda

Monday, January 7, 2013

My Make It Monday Card

Hi blogging friends!
I'm still on this Creative Jump Start high, and trying all sorts of new techniques. For today though, I have a shabby chic-ish type card!


This beautiful bird
image came from Digital Perfection on Etsy. Wanting to showcase the bird, I designed everything else around him. I sponged Vintage Photo Distress Ink over top of the image to help it match my other elements. I used a scrap of sheet music and some papers from my Glitz 6x6 Vintage Blue pad. The brads are My Mind's Eye.


The flowers and
leaves are all from I Am Roses and were sprayed with Marshmallow Glimmer Mist. I thought this could work as a birthday, encouragement or even a get well card. I always like to wait to put a sentiment on after I figure out for what occasion I'll use it.

I'm linking up at:
Make It Monday - Anything Goes

Please stop in for
a visit tomorrow... I have some special projects to show you that I did for City Crafters.

Thanks for stopping by!
Linda

Sunday, August 12, 2012

Try


Before I made my card
for the Guest Designer spot at City Crafters Challenge Blog, I printed out a test of three different sizes of the gorgeous Papillons image from The Graphics Fairy on plain copy paper. After choosing the sizes I needed and printing them on cardstock, I laid aside the test sheet. Today I saw it in a pile of designer papers on my desk, and thought, the weight of the paper would be perfect for the project I was beginning. Here is what I did...


I started with two
journal pages painted with Mustard acrylic craft paint. Then on my craft sheet, I rubbed on three colors of Distress Inks... Peeled Paint, Old Paper and Forest Moss... spritzed them with water and dipped my pages onto the wet mass of green colors. Dried with my heat tool and repeated the process.


 I sponged on additional
inks of those same colors filling in the bare spots and deepening the hues. Then with the Mini Wood Grain stencil from Crafters Workshop, I added more Forest Moss. Using my CW Mini Chicken Wire stencil, I applied jet black Archival ink with a sponge dabber. Next came the Luscious Leaves stencil and Peeled Paint.


I outlined the leaves
with Faber-Castell's black Pitt pen, added letters from Idea-ology's Salvage Stickers to spell Try and highlighted them with the Pitt pen and soft charcoal. Then fussy cut those fabulous butterflies and glued them to the pages. I put just a touch of Mustard Seed Stickles on the wings for some sparkle.


The saying is from
Stampers Anonymous' Stuff To Say... and is highlighted with with my white Gelly Roll pen. For a finishing touch, I splattered on some random drops of Dylusions Fresh Lime ink.


I'm so happy I
didn't toss that test copy in the trash can. You just never know what you can do with "leftovers".

Thanks for stopping by!
Hugs!
Linda

Saturday, May 28, 2011

Happy Birthday Dear Kirsty...

Happy Birthday to you!


My dear friend, Kirsty Vittetoe is having a birthday today! 
All the sweet ladies from City Crafter Challenge Blog are joining in to wish her the grandest of days!


Kirsty is a very special lady... so talented, kind hearted
and giving. I can't say enough about this wonder girl. I'm so happy to call her my friend.
Be sure to join in the celebration at CCCB and take
a peek at all the lovely birthday cards she has received!
Happy Birthday, Kirsty! Have a wonderful day!

Related Posts Plugin for WordPress, Blogger...