Friday, July 26, 2013

Timeless Rubber Band Album


I've had a lot of fun
lately making mini albums. Like anyone who gets hooked on this art form, I've wanted to try them all... all types, all sizes, all styles. This is my second attempt at the rubber band mini, but made larger than my first here


For the pages I used
full 12"x 12" sheets from Kaisercraft's Timeless collection. The covers are black chipboard covered with Timeless also.


For the spine, I like a
fabric cover. I was out of canvas at the time, so I tried a piece of crinoline colored with Distress Inks. Only time will tell how it wears, but I'm very fond of the look. (As you can see, Ranger still hasn't sent me my replacement Heat Tool... 3 months now.)


I covered the inside
with more Timeless, then added the pages using the rubber bands.


No embellishments on these.
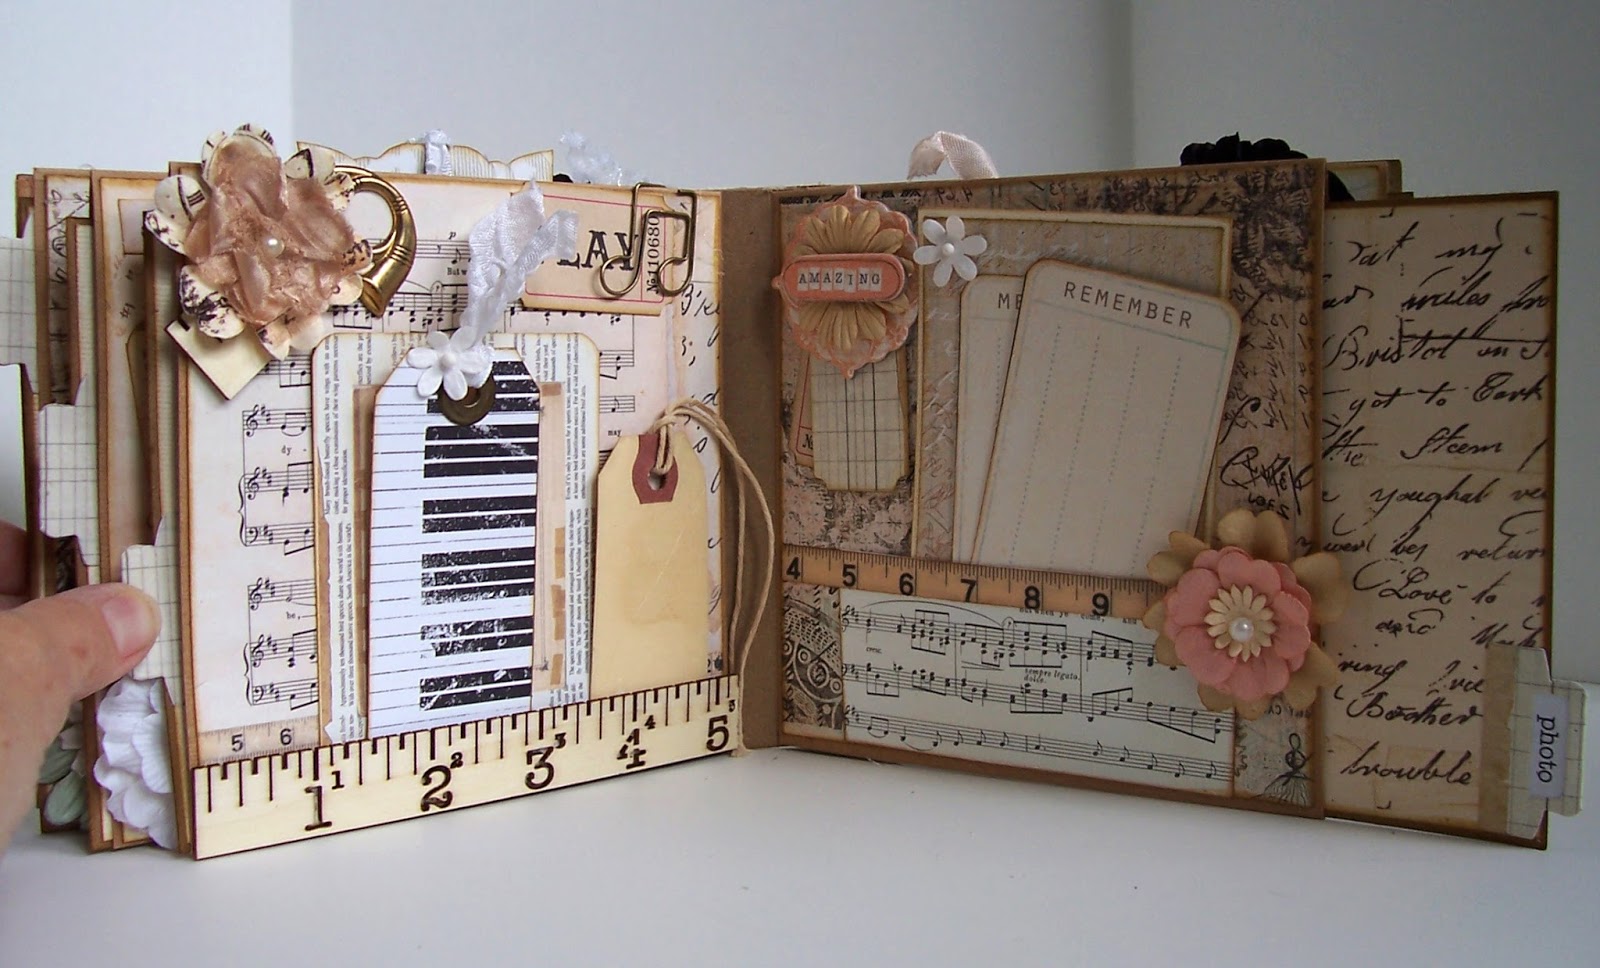

The front of each 
accordion fold page has a pocket for a journaling tag or a photo mat. The backs are just plain and will be great for photos.


Here you can see how
the rubber bands go around the spine and hold the pages on, looped through the first and second fold of each. Easy to take out and replace.


This one is fun and useful
as well. Can be used as a holder for post cards or similar paper items.
I love this hobby!
Have a great weekend, friends!

Thanks for stopping by!
Linda

Sunday, July 21, 2013

A Little Faith

The Penmaker buys
our spring water from our local Giant Eagle grocery in gallon jugs that come three to a box. We generally get four boxes every few days this time of year... which means a lot of good cardboard going to waste. Our daughter Sarah takes some for her Ebay shop, but I pulled one off the stack and cut off a nice hunk to use for craft projects. I cut one piece about 5" high and 16.5" long. I scored it at 5.5" and 11" then folded it accordion style. Gave it a spray of Dylusions Black Marble ink, and created this...


Daughter Carrie (the 
one planning the kitchen remodel here) had also posted some darling photos of her youngest, Faith. I just had to make something with these and thought they would look good on an album, of sorts, sitting on her new black Ikea Hemnes bookcases.


Not a lot of embellishment
here, just fussy cut papers. I used Prima's Romance Novel collection, Brushed Corduroy Distress Ink, May Arts ivory burlap string and a tad bit of molding paste with my CW Confetti stencil. I did the title on my computer, cut it out and backed it onto black chipboard. Used lots of 3-D foam adhesive thru-out.


Although I wasn't real
happy with the way the pink of Faith's dress looked on this paper, when I tried a black and white photo, it just didn't have that same punch I wanted.


The dove is a
Sizzlit Bird #5 die from Sizzix. The "moving" text on the RN tab is an Authentique Diction sticker.
The Penmaker and I
are both down with dizziness and general aches. A result from the change in weather, no doubt. I'll be by for a visit as soon as I can. Am really missing sitting at my Mac and my Kindle is not cooperating with me.
Have a wonderful Sunday, my friends!

I'm linking up at:
Anything Goes - Anything Goes
Word Art Wednesday - Anything Goes

Thanks for stopping by!
Linda

Friday, July 19, 2013

Carrie's Dream Kitchen

My daughter and
her husband are planning a kitchen remodel in the future, and she has been posting some beautiful photos of possibilities on her Facebook page. She put one up this week I thought could be made into an encouragement layout to hang on her fridge. Although this is only the dining area, I still think it will give her plenty to spark her imagination and keep her dreams alive.


The overall size is
8"x8" and is on a chipboard base. The papers are from Pink Paislee's Hope Chest and Graphic 45's French County collections. The chipped paint woodgrain paper is from Kaisercraft and matches the table in the photo to a T. 


I layered on some
molding paste using the Crafter's Workshop Tile Texture stencil then misted on LSG Starburst in Tibetan Poppy Teal with their Confetti stencil. Walnut Stain Distress Ink went on the edges. The corner piece is a Prima Shabby Chic Treasure.


I saw a similar 
light fixture as the one in the photo at Ikea, so I made a copy, cut it out and added it to the top left corner with 3-D foam adhesive.


The flowers are all
from Petaloo. I applied a little gesso to them as well as the papers to tone things down and give it a cohesive look. Added a Spare Parts light bulb from Hobby Lobby and an Idea-ology Dream ticket.


Also put on a Graphic 45
Staples metal key and key hole... gave them both a quick coat of gesso too. I generally just use my finger for work like this... why dirty a paint brush when it's easier to just wash my hands.
I put a mini binder
clip at the top for hanging. These are really handy for layouts and Staples sells them quite reasonably.
I'm really looking forward
to seeing what Carrie and Matt do with their kitchen. I love this color scheme and hope they'll follow through with that. I guess time will tell.

I'm linking up at:
Anything Goes - Anything Goes
Make It Monday - Anything Goes
Tuesday Throwdown - Anything Goes

Thanks for stopping by!
Linda

Thursday, July 18, 2013

Kashi Box Mini Album Interior


If you visited my
blog on Tuesday you know that my Guest Design project for the CCCB "Dress It Up" challenge is a Kashi box redo.
This is the completed album...


and here are the pages...


Lots of photo and
journaling spots on each page.


A three page spinner
tucked behind this border strip.


My little envelope
can be pulled out and tucked inside is a two page photo spot.


This page has a pocket 
made from transparent Prima packaging and has two tags tucked inside.


I think this is
probably the most tags and photo mats I've ever put in an album... tons of usable space.


Here I created a
waterfall photo spot... four pages put together with washi tape hinges.


Another spinner.

I'm linking up at:
Make It Monday - Anything Goes

Today I made an 8"x8" 
layout, then started an accordion fold album using a cut up cardboard box that had contained gallon jugs of water. I'm lovin' the recycling!
Hope you all have a great Thursday!

Thanks for stopping by!
Linda

Tuesday, July 16, 2013

Dress It Up At CCCB

This is my final
project for my spot as Guest Designer at City Crafter Challenge Blog. What a pleasure working with Kirsty, Ros, Charlene and Wendy. I've loved it, ladies... thank you from the bottom of my heart!
Ros is up as hostess
this week and has an exciting challenge for us that had me searching my home for something to decorate. She wants us to take an ordinary item (e.g. a tin, envelope, peg, jar, etc.) and "Dress It Up"!


Back to me searching
my home for an item... I opened a cabinet in the kitchen and saw...


ahh haaa... 
I don't see a box... I see an album cover!!!!
This is what I did...


I had to trim some
of the box away, gave it a quick coat of gesso and glued down some papers from Prima's Nature Garden collection.


I covered the spine
with a piece of natural canvas...


and did a modified
"stack the deck" (Laura of Following the Paper Trail) for my pages.


I added a Prima
flower and two from Petaloo. The butterfly is fussy cut from a sheet from Graphic 45.


The gems are Prima's
Say It In Crystals and my title was cut from the one of the papers.


The lace is from Surplus City.


I punched a hole
in the back cover, added a wide eyelet from We R Memory Keepers, threaded in some colored seam binding and tied on a hinge clip, jump ring and pearls from Idea-ology for my closure.


I made faux envelope
pages and covered them with the NG papers. Each page has a pocket end and holds a double sided photo mat with a tab (tubs cut with Alterations Tiny Tabs & Tags die).


When I said a modified
stack the deck... I meant that I only did five fins for pages instead of the usual six as I wanted a wide space in between each page.


I hope this will
give you some ideas for what you can do with an ordinary food packaging box.


I didn't stop here though.
I went ahead and decorated the inside with a multitude of additional pockets, tags and photo spots. Please stop back and I'll show you the finished project.
Now, hop over to see
the gorgeous things the CCCB Design Team ladies have made. And again... thank you so very much CCCB for giving me the opportunity to be a part of your challenges. I've loved every minute!

Thanks for stopping by!
Linda

Wednesday, July 10, 2013

Days Gone By

Oh goodness...
we were looking through a box of old photos the other night and came across a darling one of our three oldest grandchildren. It was taken in what use to be our Civil War Bookstore/craft supply warehouse. They're lined up on the stairs to the second level (where my office was). By the looks of what Grayden is holding, they were either having lunch or a snack. We were blessed to have worked with our family for so many years, and to have spent time with not only our four kids but our first three grandkids as well. Precious years, friends... precious years!


I started with a 
12"x12" piece of chipboard and layered on Graphic 45 papers from the Communique and French Country collections. Everything else is from An ABC Primer.


The stack of red books
on the tag were fussy cut and popped up with 3-D foam adhesive.


I used the 3-D
look on this piece, also. The flowers are Petaloo.


The smaller round alphabet 
stickers are French Country and the larger squares I cut from An ABC Primer. The base paper has a layer of molding paste I put down using the Crafters Workshop Time Travel stencil. I splattered on some Lindy's Stamp Gang Whale Watch Blue Starburst and Dylusions Black Marble sprays. There is also a hint of Archival Jet Black applied with a Prima clear stamp.


All these pieces were
fussy cut from An ABC P collection.


Everything is edged 
with Distress Ink in either Walnut Stain or Black Soot.


The canvas banners are 
by Maya Road. The Coke cap is another of my son's... he's keeping me supplied.


The flowers and leaves
are Petaloo mixed with a couple of red roses from I Am Roses.

I'm linking up at:
Make It Monday - Anything Goes

Thanks for stopping by!
Linda
Related Posts Plugin for WordPress, Blogger...