Tuesday, July 31, 2012

Never Give Up

I had every intension
of making another card, but when I saw this quote by Winston Churchill as this weeks free word art at the Word Art Wednesday Challenge #38, I knew I just had to do a journal page with it.


My page started with
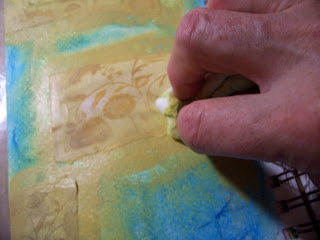
a torn sheet of Webster's Pages Yacht Club paper. I added color to the edges with Reeves water soluble wax crayons in Yellow, Sahara Yellow and Violet blending with a damp brush and my finger. Now a coat of white wash (watered down Liquitex Titanium White acrylic). Using the Mini Chicken Wire stencil from Crafter's Workshop, I dabbed on some Dusty Concord Distress Ink. Applied a bit of Wild Honey DI with a stamp from Stampers Anonymous Bitty Grunge set, and Black Soot DI sponged around the edges. Doodled over the rope with my Faber-Castell Black Pitt Pen. Finished up with lots of soft charcoal.
Never Never Never Give Up...
a good quote for all of us to remember when things get tough. I need this page handy to look at every now and then along with this verse...
 II Timothy 4:7
I have fought a good fight, I have finished my course, I have kept the faith: 
Thank you Karen, for the reminder.

I'm linking my page up at:
Balzer Designs - Art Journal Every Day

Thanks for stopping by!
Hugs!
Linda

Monday, July 30, 2012

Prima Mix

The carpet men are here
today and I'm confined to my craft room. It'll be a happy day when this remodeling is all complete. I love roaming my house, not sitting in one room. But as long as I'm stuck here, I may as well create something... right?


How about a little mix
and match with Prima's Fairy Belle and Nature Garden? These are two fabulous collections and blend so well together.


I made this card fairly
simple so it can be sent in a standard A2 envelope... (am I getting cheap in my old age?)


No dies used today...
just straight cuts, distressing and inking. Found this piece of paper doily in my scrap box... a perfect addition, I thought!
Since the Fairy Belle Tiles
were new and the package had as yet to be open, I thought my card would qualify for Shopping Our Stash's Challenge #61... Something New. Why not join me in entering... there is still time to do so today!
Now, maybe I can get
another one put together before these guys load up and leave!

Thanks for stopping by!
Hugs!
Linda

Saturday, July 28, 2012

Vintage Blue Happiness

Remember yesterday
I mentioned working on a new background? Here is how it started out...


Swirls of water soluble 
wax crayons in three shades of blue.


Blending with a baby wipe.


Adding Glitz Vintage
Blue paper torn in strips... painting over and wiping off excess with a clean baby wipe.
Some stamping...
then a coat of white wash (I use watered down white craft paint).
Some ink misting using a stencil completed this background... now for some more fun!


I used the Vintage Blue
6x6 paper pad and Whatnots, some vintage buttons, old dictionary paper and a tag.


Spellbinders Foliage die,
Alterations Mini Hearts Set, Vintage Photo and Evergreen Bough Distress Inks, Meadow Green
and Patina Glimmer Mist


Happiness in a journal!

Thanks for stopping by!
Hugs!
Linda

Friday, July 27, 2012

Get Well Cards

Completed two more
cards of the get well variety. I've been pulling papers out of some of the old Pixie kits I have stacked in my closet. Boy, do I ever miss Kirsty coming out with new ones... that use to be the highlight of my month. I just haven't found any other kits I like as well as the one she sold.


After finishing these
two, I turned on a ustream and followed along in making a background in my art journal. Today I plan on doing some more work with it, but so far I haven't much of an idea as to what. I checked out a couple friend's blogs for inspiration and struck gold! Look what Linda Robinson posted at My Happy Place. Isn't this fabulous!!!! Thank you, Linda! You've given me the push I needed!
Hope you all have a wonderful day!

Thanks for stopping by!
Hugs!
Linda

Thursday, July 26, 2012

Back To Card Making

With my card stash
depleting, I thought it was time to break out the paper and dies and get creating. The first is made from the Glitz Pretty In Pink 6x6 paper pack.


For this card, I used
a sheet of My Mind's Eye Union Square called Birds of a Feather.


I made them both
fairly simple so they would fit into an envelope. Mailing in the padded variety is getting expensive, and I wanted to keep the cost down.

The weather here is quite
unusual... I can't remember ever having a summer like this one. How has it been in your area? I'd like to hear about it.

Thanks for stopping by!
Hugs!
Linda 

Sunday, July 22, 2012

Use Your Talents... Be Original!

With some remodeling
going on in our house and a family garage sale going on outside our house, I haven't had a lot of time for creating. I did however finish these pages today...


My goal was to
photograph the entire process, but I failed miserably with all the other activities going on throughout the week.


This was the start of it all...
layers of Distress Inks applied it my craft sheet, spritzed with water, then dipping the pages into the inky goodness.


Drying... and doing it again!
Lots of additional layers of stamping, torn papers, inks and gel medium.

Now just a few photos
I took at our sale of some of our grandchildren....


You can see here how
dry everything is. Our daylillies are dying and the lawn is brown. We had some rain over the weekend, buy not enough to green things back up.

Thanks for stopping by!
Hugs!
Linda
Friday, July 13, 2012

Napkin Project

Did you ever see a
new technique and want to try it right away? That happened to me this week when I learned I could take an old napkin and use it as a background in my journal.


I started by cutting my 
napkin in half then taking the two back layers off. I placed the napkin on the pages that I had prepped with soft gel medium, then covered over the napkin with more medium. I did the same with a strip of tissue tape at the top of each page. 


When it was all dry,
I sprayed on Dylusions Fresh Lime ink using my Dylusions Luscious Leaves stencil. I sprayed a bit of Wild Plum Color Wash on next, and taking some ivory acrylic craft paint, began blending the two together. Painted more ivory paint on the sides and across the bottom, then edged it all with Peeled Paint Distress Ink. It needed some more texture, so I stamped on Peeled Paint with my SA Crackle stamp.


By now, I was really
into these pages, and started outlining some of the leaves with my ultra fine black Sharpie and doodling some vines. Needs more color... so putting some Peeled Paint on my craft mat and spritzing with water, I began blending it onto the leaf areas. Then I thought... I can do the same with some of my I Am Roses tiny white blooms... which I did using Wild Honey, Spiced Marmalade and Dusty Concord DI with water. These I glued to the pages with Tombow Mono Multi glue. I did my journaling at this point using my Sharpie. (I have "Essential Tremor" thus the bad handwriting!)


If you try this,
be sure your page is completely dry after applying your medium, or the napkin will start to pull up and fall apart.


A bit more tweeking
with ink blending, then I was satisfied with the look.


The date stamped in
the right corner finished my project.
Now, I have to find
something new to make today... do you have any ideas? Please let me know!

Thanks for stopping by!
Hugs!
Linda

Thursday, July 12, 2012

J Is For Journey

This card is a combination
of My Mind's Eye Kraft Funday and Simple Stories Documented papers. I am crazy about anything kraft, and these papers fulfill that love. I hope our young friend that recently graduated high school will like it also!


The card base and
mat are of kraft from Core'dinations. The two brads I used are also from the MME Kraft Funday collection.


The car was cut with 
Alterations Mini Old Jalopy & Arrow Set and the cord is Divine Twine Baker's Twine from Etsy shop Endless Inkabilities.


I stamped the cap
with Jet Black Archival Ink, fussy cut it and popped it up with 3-D foam adhesive. Sponged Vintage Photo Distress Ink on all the edges. 
I had a Bible verse on the inside, but forgot to get a photo of it.
I'm entering my card at:
Word Art Wednesday - Challenge #36

Tuesday morning the Penmaker
and I were shopping for a new mat to put under my desk. My chair has wheels and is not very good on our carpet. My last two were purchased by the company I worked for, so we had no idea as to the cost. We had a rather rude awakening when we got the the mat section of the office supplies store and discovered that the style we needed was $69.95... for a floor mat???
While we stood there, mouths open, a stranger approached us. I assumed he worked there. He started up a conversation... now if you knew the Penmaker you wouldn't think this at all odd, because where ever we go, people always stop to talk with him... he just has a kind and friendly face, I guess. Well anyway, this man told us he had several mats he wasn't using in a storage unit at his business and if we wanted to drive over, he would give us one if we liked it. ARE YOU KIDDING!!! We went... turns out he was in construction, had a beautiful business he worked from and not only gave us a fabulous floor mat, better than any we ever had before, but insisted on carrying it to the car for us. The catch... absolutely none! 
The Lord is so good... what a blessing to start our day!

Thank you for stopping by!
Hugs!
Linda

Tuesday, July 10, 2012

What Time I Am Afraid,

After watching a You Tube
video, I attempted to make a similar background. My idea was then to post said video so you could enjoy and learn also. However, I can't find where I bookmarked it to... now how stupid is that????
Plan #2... I will try to describe how it's done...


Rub your Distress Ink 
pads (I used Vintage Photo and Tumbled Glass) onto your craft mat and mist with water. Lay your page onto the inks picking up a good amount then dry with your heat tool. Repeat. Now using your sponge applicator, apply more full strength ink directly onto the page filling in all the bare areas... here I added Walnut Stain DI also. Using the Mini Time Travel Crafter's Workshop stencil, I dabbed on Navy Ink It Up Ink randomly on the pages. I then stamped script with Archival Coffee over all. Next I tore some pieces of an old dress pattern and applied them with Golden Soft Gel medium.


I cut this Alterations
Tick Tock die with copper sheeting, Kraft cardstock and Bo Bunny Timepiece Dot paper, piecing it together, gluing it down with Tombow Mono Multi glue, then edging and smudging with extra soft charcoal.


I fussy cut some of the
clocks from the Bo Bunny paper, edged them with Walnut Stain DI and applied with the Soft Gel. Did the same with the verse, then sponged more Walnut Stain onto the edges of the pages. Complete!
I'm entering my project at:
Word Art Wednesday - Challenge #35

Am also linking to:
Balzer Designs - Art Journal Every Day

Thanks for the visit!
Hugs!
Linda

Saturday, July 7, 2012

A New Journal

Hobby Lobby had art
 journals on sale at 40% off this week, so I just had to buy one. Even though there are still a few blank pages in my old journal, I was excited to use this clean, new collection of watercolor pages. So I did...


First I applied a coat
of gesso, dried it with my heat tool, then added a strip of tissue tape down the left side.  For the background I used several shades of blue and green Reeves water soluble wax pastels that I purchased for a song... honestly three dollars and change for a 24 color set in the HL close-out section. Some aqua artist paint rubbed on with my finger down the sides. Next some stamping with my Bitty Grunge set from Stampers Anonymous with green and navy Stamp It Up Inks. Using watered down Denim Colorwash in a mini mister and the Luscious Leaves Dylusions stencil, I added a border of leaves. Stamped on the Dina Wakley Silhouette Script with Jet Black Archival Ink along with some wording from the Stuff To Say SA set. Stamped the sun rays from Bitty Grunge with yellow Stamp It Up Ink above my girl and the flower trio from Dylusions How Does Your Garden Grow at her feet.


Now the really fun stuff...
soft charcoal... smudged on the right side of the silhouette and paint on all the flowers and leaves. More outlining with a black marker and highlighting with a white gel pen.
Ahhh... a happy beginning!
I'm sharing my journal page at:
Balzer Designs - Art Journal Every Day
Have a great weekend, friends... stay safe and cool.

Thanks for stopping by!
Hugs!
Linda

Thursday, July 5, 2012

New Supplies Workout

Two orders arrived 
this week with dies, rubber stamps and a stencil, so I had to try them out.


I started by applying
crinoline and vintage music paper with matte Mod Podge. When dry, brushed on a coat of gesso.


Brushed on some
Mustard craft paint, then rubbed some off with a baby wipe after it had dried.


Repeated the process
with Light Yellow paint. Using Crafter's Workshop Mini Time Travel stencil and Denim Color Wash, I added another layer. Rubbed on some Aqua paint with my finger and stamped on Jet Black Archival Ink with the Crackle stamp from Stampers Anonymous for more texture.


Edged the pages
with the Archival Ink then stamped on some more with the numbers stamp from the SA Stuff To Say set. Using the stencil again, I sprayed on some Baby Blue Eyes Aqua Starburst Spray... love that shine!


I glued on the
verse with Tombo Multi Mono Glue. I edged each section with a soft charcoal pencil, smudging outward for a shadowing effect.


Cut a couple
paper scraps from my stash with the clock die from the Alterations Vintage Alarm Clock & Camera Set. Did some shadowing on it also.
Hope you have
a fantastic Thursday... stay cool!

Thanks for the visit!
Hugs!
Linda

Tuesday, July 3, 2012

Using My Stash

In an attempt to
minimize my paper and embellishments stash, I plan on making lots of projects with this "old stuff". Here is one I just finished...


All made from older
materials except the white mini blossoms from I Am Roses. 


Am entering my card at:
Shopping Our Stash - Triple Threat
Have a wonderful Tuesday!

Thanks for stopping by!
Hugs!
Linda
Related Posts Plugin for WordPress, Blogger...