Tuesday, March 12, 2013

Rubber Band Mini Album

Over the last couple months 
I've watched several gals making albums using rubber bands beginning with Inkwell on Ustream. I just had to try one, and although mine doesn't come close to the beauties I've seen being made, it's a start...


Some of the crafters
made theirs from file folders.  I think that was the original method, but I then saw some being made with 12x12 patterned paper. That's what I tried, pulling out some old papers from my stash. After all... why ruin my good stuff if I'm not sure of what I'm doing... right?


The covers are paper 
covered chipboard. My folds cracked in places even though I thought I was following the directions. Am not sure how to remedy this.


Front side of my first page.


Back side.
I put a few tags in so you can see the pockets.
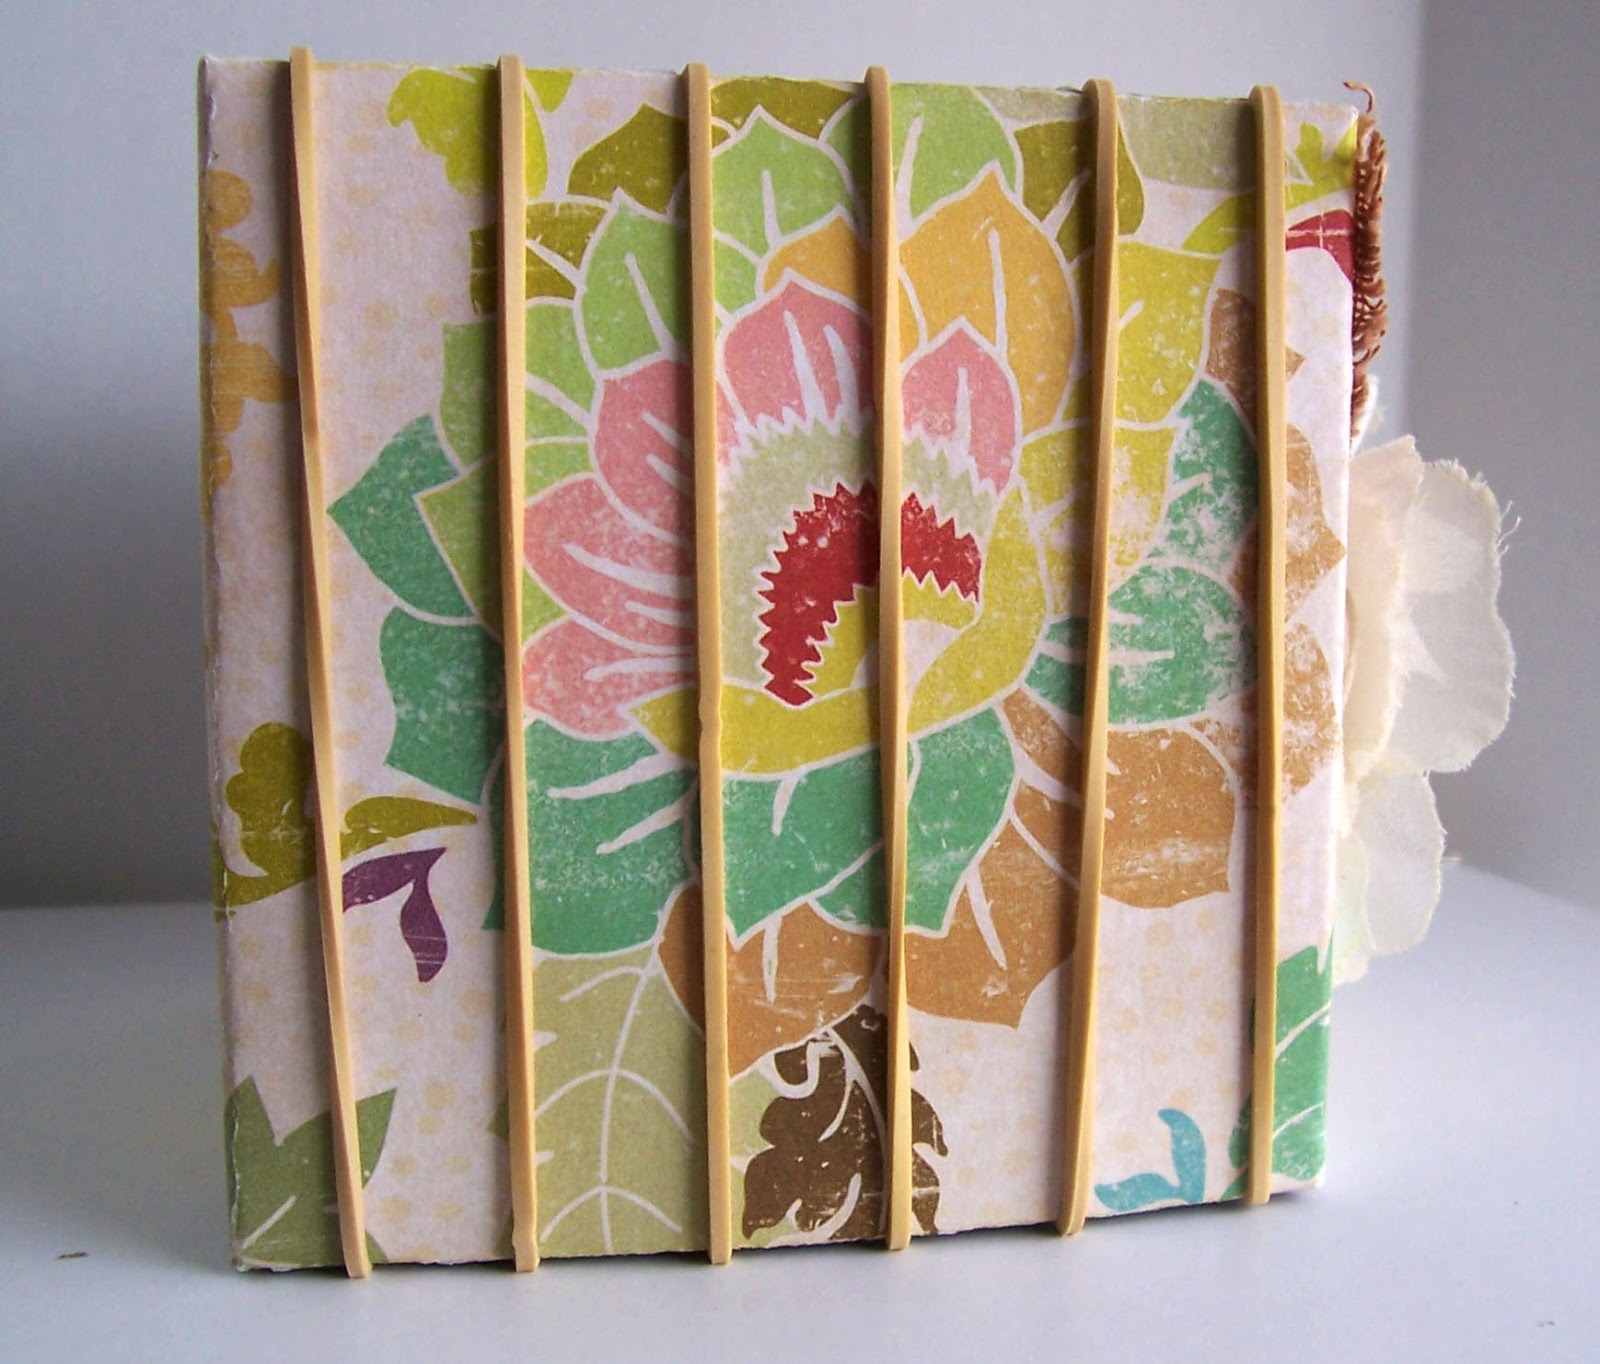

Rubber bands holding
the pages in place in the album.


Each signature pulls 
out... one 12x12 folded sheet of paper being a signature with four pockets on each side and one pocket on each end. Lots of storage space for ATC's, address cards, etc.


I must try this again!

I'm linking up at:

Make It Monday - Anything Goes

Thanks for stopping by!
Linda

Monday, March 11, 2013

Happy Monday Morning!

Hope you're all doing well.
I was thinking of changing my blog header for spring, and then the Penmaker told me we are suppose to have snow the rest of the week... ugh!!! Thoughts of Florida are swirling around in my head again.
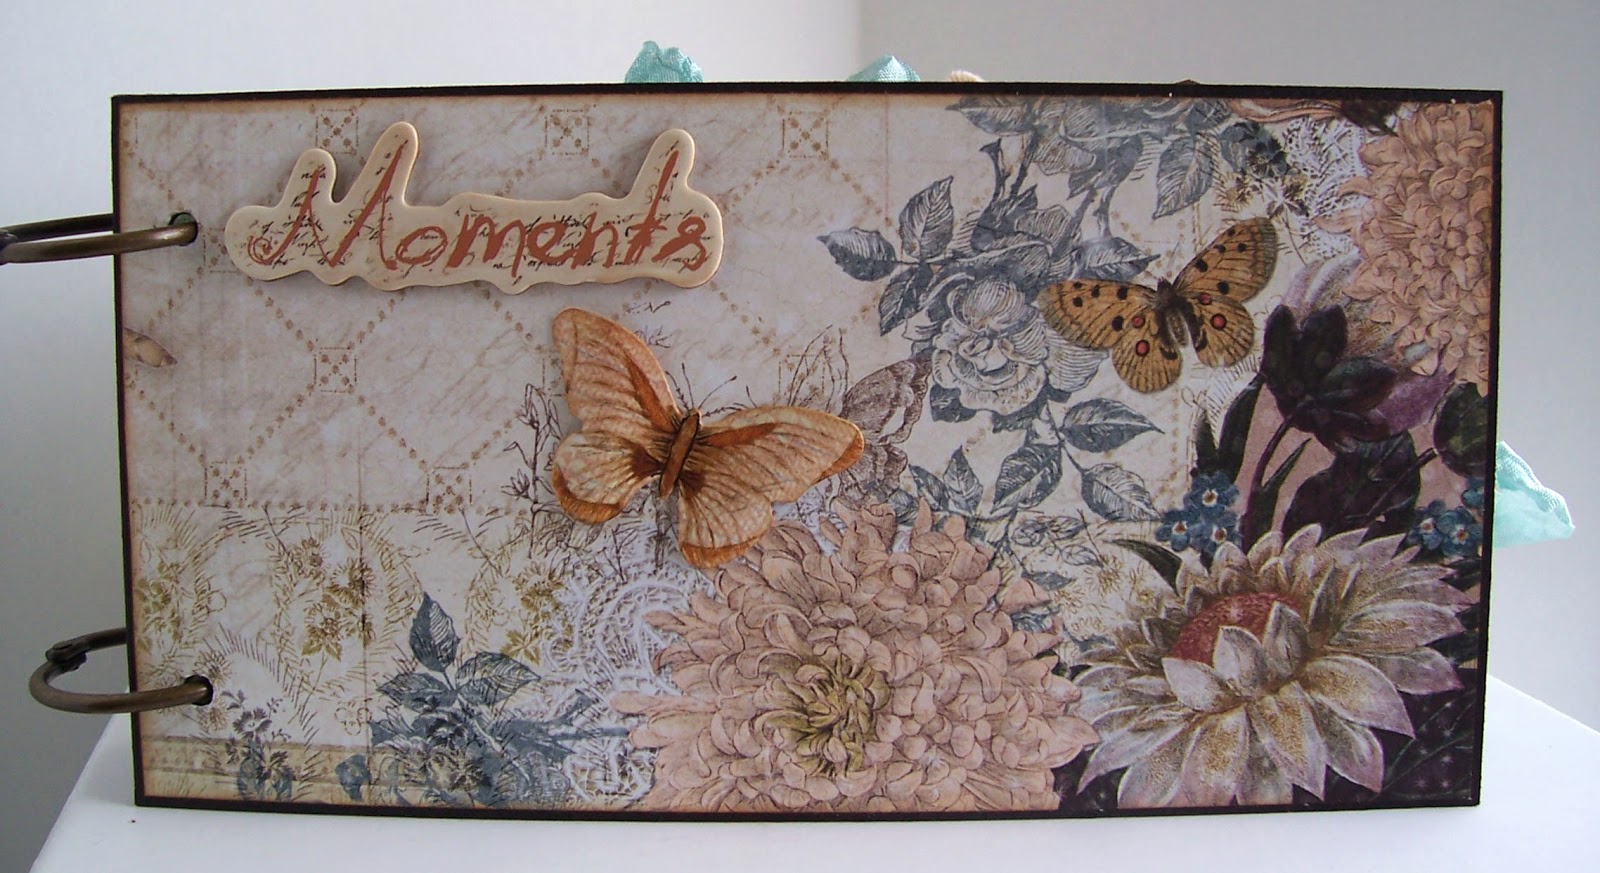
I did a mini album to 
give to my son's sister-in-law who had a birthday last week...


The covers are cut from
black medium weight chipboard. For the most part, I've used Prima's Fairy Belle collection. 


The butterfly here was
cut with Alterations Mini Butterflies and inked with Black Soot, Rusty Hinge and Wild Honey Distress Ink. I curved the wings with a paint brush handle.


I made this with lots
of tags for journaling and photo spots so she can put in what she wants. Flowers from I Am Roses.


These mini photo tags
were cut from the Timeless Type 8x8 stack from DCWV. The wooden clock is Prima.


Each of the pages are
cut from a single sheet of patterned paper 8.5" square, then trimmed and folded as above, adhered with Score Tape forming a pocket. 


I added a decorated
#8 black tag in the pocket end of each page, but on this one I added a photo of her hubby, our son and the Penmaker. We girls were shopping in the mall and when we came out of the store, saw our guys watching a basketball game through the window of a sporting goods store... couldn't miss a shot like that!


A Shabby Chic Treasures 
bird from Prima, Melissa Frances tags, Authentique alphas.


A Prima clock, TPC Studio
 rhinestone, a Momenta key and ribbon from Michaels.


Wide eyelets by 
We R Memory Keepers, dies cut with Spellbinders Classic Ovals, Scalloped Ovals and Floral Doily Motifs, Venise Lace Applique heart from The Funky Junkie Boutique.


My Mind's Eye Follow
Your Heart layered stickers.


Petaloos flowers,
Recollections bling, metal butterfly from Lindy's Stamp Gang.


Prima flower,
I Am Roses and Petaloo flowers.


Prima chipboard,
stamps, image and post card cut from Graphic 45's Place In Time 8x8 paper pad.


Prima and Petaloo
flowers, French Lace paper doily.


Prima flowers,
feathers from a mixed package from Hobby Lobby.


Sorry for the length
of this post... hopped you enjoyed looking at it though!

I'm linking up at:
Make It Monday - Anything Goes

Thanks for stopping by!
Linda
Saturday, March 9, 2013

"I Almost Wish We Were Butterflies

and liv'd but three summer days - three such days with you I could fill with more delight than fifty common years could ever contain.” John Keats


Going through one
of my art journals, I discovered that there were still some unfinished pages... ones I had applied excess paint and ink to from another project (I'm sure most of you know what I mean). These two pages both had lime green stenciled ivy vines and random brushed paint. So I pulled out a piece of  a torn dress pattern and stamped on a few images...


then glued it on with
a hefty helping of soft gel medium. Heat tool. Using my finger, I put on  Titanium White acrylic paint with some dabs of Peeled Paint Distress Stain and a few squirts of water from a mister. Heat tool.


I rubbed Distress Ink pads,
Peeled Paint, Bundled Sage and Rusty Hinge, on my craft mat, misted with water and drug my journal pages through the lovely mass of liquid. Heat tool. More dragging. Heat tool. And once again. Heat tool. Now with a sponge applicator, I rubbed on more Peeled Paint DI.


Now I cut out six butterflies 
from a sheet of KaiserCraft Timeless paper called, not surprisingly, "Butterflies" and added them to the mix using the soft gel.


My computer created
quote went on the page in the same fashion. A bit of Black Soot Distress Ink sponged around the perimeter finished off my play time. This page has a botanical flair, don't you think? I love the greens!

I'm linking up at:
Balzer Designs - Art Journal Every Day

Thanks for stopping by!
Linda

Friday, March 8, 2013

A Christmas Mini Album

If you saw my post
yesterday, you know what to expect today... the Christmas mini I took along on our Smokey Mountain vacation. I received the basic album as a gift from my sister...


and discovered that I could take it apart and peel off the pages one by one... which I did. Now I can create layouts on each and insert them back into the book.


I have to keep it pretty
plain or it will be so thick I won't be able to turn the pages. As it is now, I don't believe I'll use half of these... so I'll be able to make another book using a chipboard cover.
Here I am in my loft space
in our SM cabin working on some pages of our grandchildren...


The view from this
window was amazing. Sometimes it was hard to concentrate on what I was making, but what a magnificent spot to work.


Those green bags on
the table were from Your Scrapbook Superstore. I went shopping there three times this trip. The Penmaker would drop me off and take his Kendle Fire down to the cafe in the Books A Million and wait. He said he got to be just one of the old boys hanging out in there. LOL  My sweetheart is so patient with me, God bless him!


Tracy... note the
bottle of white Flower Soft I bought after seeing what you did with yours.


These are the four
pages I did while at the cabin... I just need to get some tiny alphas to put their names on the tags. I can't seem to find red ones anywhere.


I'll show you more
pages at a later time... projects are piling up that need photographed... yikes! ... and I'm on day six of this sinus headache and dizziness. Must be a record for me... haha!

Thanks for stopping by!
Linda

Thursday, March 7, 2013

There Are Times We Need To Be Flexible

Hi friends!
There are times in our life that don't go quite as we had planned. That's not a bad thing... it just means we have to be flexible. Take our Florida vacation, for instance. We had our reservations made, the routes mapped out and some of our clothes packed when we realized the weather in Orlando was changing... temperature declining with a promise of rain. The day before we were to leave, we made a mad scramble to cancel and reschedule. We ended up in a beautiful log cabin in the Smokey Mountains, nestled among the pine trees on a west facing slope. 


I have to admit
that the temperature may not have been as warm had we gone on farther south, but this cabin would have been hard to beat. Besides that, I was able to visit my favorite shop in Pigeon Forge...


 The Penmaker and
I have both been sick with sinus headaches since we've gotten back home, and I haven't been able to do much as far as crafting goes. I did have a great spot to work at in the cabin loft, and got a few pages done in my Christmas album. I'll show you those tomorrow.
It's good to be back,
and I'm looking forward to visiting you all.

Thanks for stopping by!
Linda

Friday, February 22, 2013

One Must Be Brave To Be An Artist

I don't believe I'm
 either, but I sure am having fun playing around with my new art journal...
the first page in my Strathmore 5.5" x 8.5" mixed media...


I did a background 
of Mustard Seed, Chipped Sapphire and Broken China Distress Ink. Did some ghosting with a Crafters Workshop Chunk Chevron stencil and water then a little stamping. The banner and flowers are made from Glitz Vintage Blue 6" x 6" paper pad. I doodled around on the stems, leaves and flowers with a Faber-Castell S Pitt pen and shaded with the Chipped Sapphire. The flowers were cut with Alterations Tattered Florals and shaped with the handle of a small paint brush. The flower centers are colored with Mustard Seed Stickles. The text is from Cosmo Cricket's Tiny Text Art sticker sheet and edged with the Pitt pen. The rhinestones are TPC Studio.


The doodling at the
bottom was done on a strip of paper and glued onto the page. I actually stamped it first with Unity She Art Doodles then went over it all with my Pitt pen. I filled in with a white Gelly Roll pen... can't seem to leave things as is... just have to keep on playing! Actually, as I'm looking at it, I think I'll go back and do some shading on the leaves.
We'll be leaving for our
trip to Florida soon, so I won't be around much the next couple of weeks. I had planned on getting ahead with projects and scheduling them, but with a large family that's not always possible. I will try to keep in touch, though.

I'm linking up at:
Balzer Designs - Art Journal Every Day
City Crafter Challenge - All That Glitters
Make It Monday - Anything Goes

Thanks so much for stopping by!
Linda

Thursday, February 21, 2013

All That Glitters Has A Song

Charlene's put together
a fun challenge this week at City Crafters called "All That Glitters". 


Add any kind or color of glitter to your project, like mine here...


I put Clear Rock
Candy Stickles on all my white flowers and on my stamped image (wish the camera would pick it up better).  


I used a black 
textured cardstock base and papers from Basic Greys' Basic Manila and My Mind's Eye So Sophie 6x6 pads.


This stamp is from
Artistic Outpost's Serenity stamp set and teamed with Archival Ink in Jet Black. Black Soot Distress Ink was sponged on the paper edges after I distressed them with my paper distresser from Tonic.


The metal black bird
is by Momenta. The white flowers are I Am Roses and the lavender ones are Recollections. The clock is chipboard cut with Alterations Weathered Clock die and finished in Tarnished Brass Distress Stain and Titanium White acrylic paint for a shabby chic look.


The doily is French
Lace paper and the feathers came from a mixed packaged purchased at Hobby Lobby.
I've tried every camera
angle I could think of, but with no sunlight today I believed I've failed at showing you the glitter accents... I apologize!

I'm linking up at:
City Crafters Challenge - All That Glitters
Frilly and Funky - Layer it On and Share a Word

Thanks for stopping by!
Linda

Related Posts Plugin for WordPress, Blogger...