Showing posts with label Simple Treasures Journal Mini Album. Show all posts

Friday, December 20, 2013

Mini Christmas Tags And "Rejoice" Christmas Mini Album


These are two smaller
tags I created on 4.25" x 2.125" kraft tags from Hobby Lobby by The Paper Studio. The paper is Graphic 45, the gorgeous red flowers are by Petaloo and the stars are Artisan Chipboard from Pink Paislee.


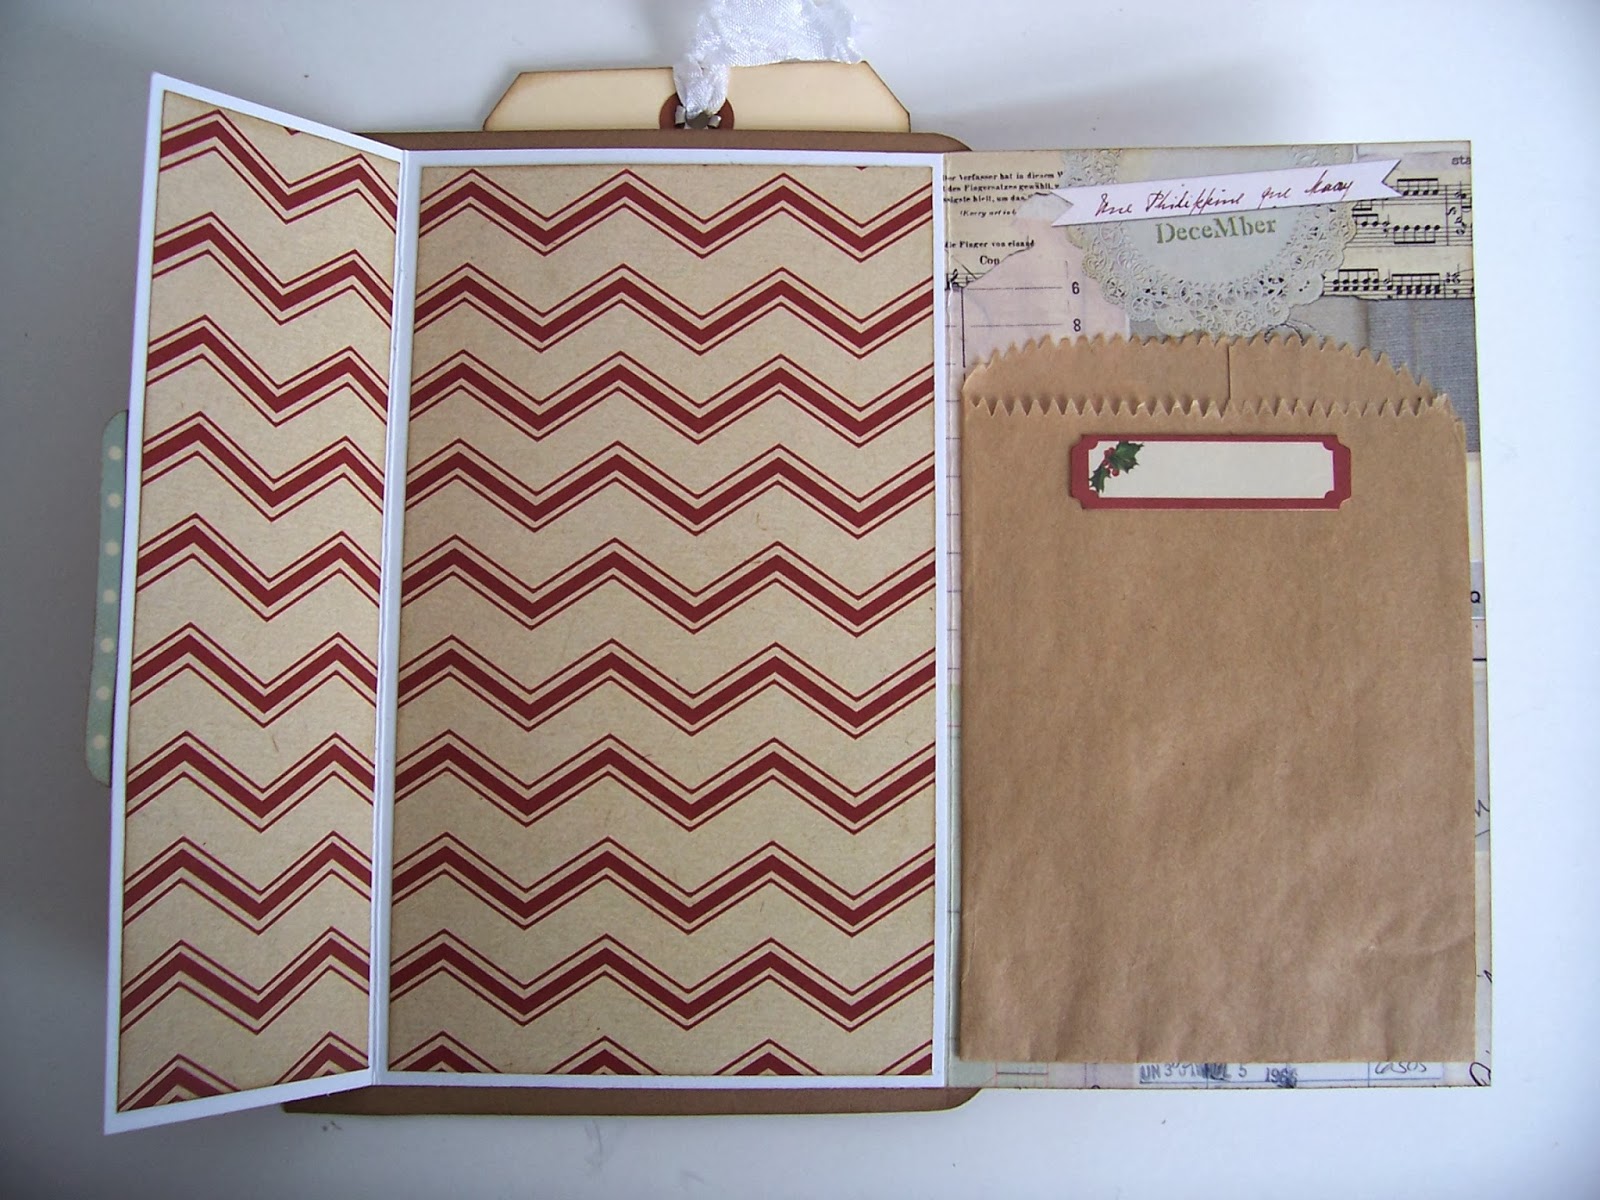
Now for a few more pages
from my Rejoice Christmas mini album. Did you notice that the pages are alternated with kraft, black and white cardstock? You might also be thinking that you've seen the design of some of these pages before, which you would have if you visit my blog regularly. The basic pattern for this album is the Simple Treasures one by Laura Denison that I posted here in October. I just love this style, so I carried it out in the Christmas theme.


I really thought I could get
through this album today, but it looks like I'll have to go with one more post... just too many photos to show you.
Have a wonderful weekend, friends!

Thanks for stopping by!
Linda

Wednesday, October 16, 2013

Simple Treasures Journal Mini Album Part 5


Coming to the end of this
series of posts on the Simple Treasures Journal Mini Album, I realize I have nothing more to add to what I've already said about this experience. It was truly a rewarding journey for me!

Here are my last two pages...

page seventeen

This one is absolutely loaded.


Top pocket with tag.


The front flips up to 
reveal a mini kraft bag with photo mats behind. Laura had used a time card in this spot... something I didn't have in my stash, so I improvised with some old Prima packaging.


 A tag in the mini kraft bag...


which, when folded down,
shows you still another pocket...


containing another photo mat/journaling card.


 Going back to the front,
we have a side pocket that holds a large folder for photos and a small spot for journaling.


page eighteen

This final page was probably
the hardest for me to photograph. This is a four page double sided booklet attached to the base with Baker's twine.


Each of four pages is
tabbed with a kraft tag, tied with twine and matted for photos...


with one large photo mat
at the very back adorned with a pretty red Petaloo bloom for a splash of color.
I hope you've enjoyed having
a peek at my Simple Treasures JMA... which was not so simple, but certainly to me, a treasure!

I'm linking up at:
 Make It Monday - Anything Goes

Thanks for stopping by!
Linda

Tuesday, October 15, 2013

Simple Treasures Journal Mini Album Part 4


In the weeks while I was
working on this album, I wondered if I would ever finish. Now that it's complete, am writing these posts and remembering how much fun it was to participate in Laura's classes and how much I truly enjoyed the experience. It's something I'll want to try again, for sure!!!
So... let's get right into
these pages... and while doing so, I can relive some of those pleasant times in my memory.

page fourteen

This is a first. I only took
 one photo of this page and yet it's at the top part of the list of my favorites. This photo just doesn't do the colors justice. These papers are SO gorgeous. Two simple tags made into pockets with Prima Printables Notecards inserted (again in the natural uncolored state).

page fifteen


All three of these mats are
hinged and flip back to to expose the back side for more photo space or journaling.


Here is the correct order.
Again, I'm overwhelmed at how beautiful this Kaisercraft Curiosity collection is.

page sixteen

This pocket/flap is made
with a plain white envelope. I believe Laura used one in kraft. After searching through my stash, I couldn't find one in the right size, so I opted for white.


This is the first mat
tucked into the front portion of the envelope...


flip it back, and you
have two more mats. The top of the envelope forms a pocket that contains a large tag...


and inside the envelope
there is one final mat. Once you start putting these together, it's rather an amusement to see how many different options for pocket placement you can create.
Just a couple more
pages to go... I hope you'll be back tomorrow for the finale... then I'll move on to my next project. 

Thanks for stopping by!
Linda

Monday, October 14, 2013

Simple Treasures Journal Mini Album Part 3


This post is a continuation
of a five part series on a mini album I recently made following Laura Denison's Ustream videos at
For those of you who
would enjoy making a mini album for the coming holidays, Laura has a Christmas version of this same journal mini album. She had a complete kit available, but she sells out rather quickly. You can check it out on her blog here or her store here. As I said previously, I used my own stash since I had most of the same materials already on hand. (Hummm... I wonder if that means I buy too much!) 

Here is today's installment...

page ten

This page is one that
I made myself using watercolor paper. I cut it 5 1/2" instead of the 7" which is the size of those that came in the Prima Mixed Media Album kit (and the width of Laura's Vintage Vanity Album). I forgot to mention on the previous posts that pages three/four and nine were also of the watercolor paper and the smaller size.


Side pocket with mat.


Front tri-fold mat.


Tons of real estate
for photos... you can get two 5 x 7" on these if you wish or several smaller sizes.

page eleven

Front pocket with a mat.


With the front mat removed,
you can see the side mat that slips into the pocket formed by the semi-transparent bag. I was actually able to put on two of those bags since my pages were larger than Laura's original ones. We created our own tags following her basic instructions.

page twelve

Side pocket with mat.


Front slit-pocket with mat 
created with Prima Printables Notecard. Laura did a segment of coloring techniques for the Printables, but I liked mine in the natural color. To each his own, right?


Flap under the Printable mat.

page thirteen

This page features one
of Laura's ingenious ideas using Prima packaging. This front flap is a repurposed partial piece of a Finnabair Elements package.


On the back of the flap
is a coin envelope pocket with tag. The back part of the packaging forms another pocket. Again... lots of real estate!!!
That's all for today, friends!

Thanks for stopping by!
Linda
Related Posts Plugin for WordPress, Blogger...