Monday, April 1, 2013

Paper Bag Mini Album

If you visit my
 blog regularly, no doubt you know that I'm in love with Prima's Engraver collection. Here is another project I've made using Engraver plus two tiny paper bags...


No kidding... 
the base of this album is just two black 3.5" x 2" x 6.75" paper bags (I bought the Celebrate It brand from Michaels). A while back, Stephanie Miller announced on her blog that she would be making a super cute and easy mini album with Engraver March 29th on Live with Prima. I assembled all my "ingredients" and anxiously waited for the date. Stef seems to have an amazing amount of energy and puts it to good use pumping out one fabulous mini album after another. 


There are so many
places in this little mini to put photos or to journal... and you actually can add more wherever you want.


Photo spots.


More photo spots.


A tag pocket.


The back section
lifts up to reveal more pockets and space for photos... and the size is just perfect to tuck into your purse and pull out at a moments notice to reveal photos of your grandchildren (for those blessed) to unsuspecting friends.


I made this one for
my future daughter-in-law, and put in a couple photos to get her started.


Another pocket for 
journaling spots and space for a photo.


If you're interested
in making one of these, here are the complete instructions on Live with Prima .

I'm linking up at:
Make It Monday - Anything Goes

Thanks for stopping by!
Linda

Friday, March 29, 2013

Engraver Hanging Mini Album


Last week I watched
a Ustream video on how you can make a hanging mini album with an Ikea Tolsby frame. Since the Penmaker and I were going to Ikea on Friday, I put that item on the top of my shopping list. I bought two.
After going through
the video three more times... I began...


This first step is
really messy. I had to call to the Penmaker to bring me some baby wipes, which had gotten moved to another room, as I couldn't even open the door for the gel medium coating my hands.


You need to tear your
 paper into strips, ink the edges and glue them to the frame with the medium. It goes fast, and all in all, well worth the effort.


I love the combination
of the Printery and Engraver papers... both from Prima. Here are the pages in order, front to back.


The flowers are all
either from Prima's Engraver collection or I Am Roses.


The chipboard pieces
and stickers are part of Prima's Engraver.


Prima Engraver brads,
Say It In Crystals and clock piece.


The game spinner is Idea-ology.


The album theme is
couples... the Penmaker, me and our four children with their spouses.


I'm still waiting for
two more photos, so I just left a blank tag to adhere them to when I receive them.


I printed the photos
in sepia to match the paper collections.


The eyelets are from Memory Keepers.


The metal corners and key are Momenta.


Black chipboard by Graffix.


Metal gears, pen nib, wings and pin by Idea-ology.


Rifle charm and paper
doilies are from my stash. The Distress Ink I used on all the paper edges is Walnut Stain.


I think that in time
this will hang a little flatter. If I make another, I won't use as many bulky embellishments. I must say I'm very happy with this project, and I thank Limor for the idea. 
Have a wonderful weekend, friends!

I'm linking up at:
Make It Monday - Anything Goes

Thanks for stopping by!
Linda

Thursday, March 28, 2013

A Sneak Peek

I'm late getting
things done this morning... still in my pj's. I was excited to get back to work on a standing mini album made from an Ikea frame, and forgot to write my post... tisk tisk! To top it off, my desk is loaded with supplies and I have eyelets sticking to my arm as I try to reach across this mess to type. 
Just have to show you a peek at this...


It's Prima's Engraver
collection with some Printery thrown in and hanging from an Ikea Tolsby $1.49 frame...
but onto today's project.
This is just a couple playin' around mixed-media pages...


I bought this cheapo
composition book at Staples last year to use as a practice work journal. It's where I brush on my leftover paint and gesso. The problem I have with it is... the pages are ruled and thin. I have to glue two together and pile gesso on to cover the lines... then they wrinkle. (Anyone else go through this? Ideas?)


I'm linking up at:
Balzer Designs - Art Journal Every Day

I hope you all
have a wonderful Thursday... hey, the weekend's coming fast! Please check back tomorrow if you can... I'm dying to show you this hanging album.
Remember to watch for our Giveaway coming soon!

Thanks for stopping by!
Linda

Wednesday, March 27, 2013

Washi Tag


When I read about the
challenge hostess Kirsty came up with this week at City Crafters, I just knew I had to drop my paint brush and gesso, and get in on this instead. Pull out your washi tape and tags, girls, and create a Washi Tag!


I recently bought some
black #8 tags, so I started with one of those, and my new Prima Engraver washi tape.


This morning I had 
downloaded three freebie tags from Prima's Facebook page. I cut out one of those and added it to the mix along with the Prima Engraver collection. I kid you not... I have nearly every product in this collection... just a couple more items I need to find. I LOVE THIS COLLECTION!!!


This pretty wood berry
piece is from KaiserCraft. When I received it in the mail, it was broken, so I just cut it up even more and used the smaller sections.


Be sure to check out
the Design Teams projects... some pretty stuff!!! And you must see their Guest Designer Wendy's blog... WOW!

Now... The Penmaker presents...


When he was 
buying acrylic blanks last week, I asked him to get this one... French Country right?


He's doing styluses
now. He made one for me a few weeks back, and I can't do without it for my Kindle. Mine is blue to match my case.


Watch for a Giveaway soon!
The Penmaker and I are working on something special.

I'm linking up at:
City Crafters Challenge - Washi Tag
Make It Monday - Anything Goes

Thanks for stopping by!
Linda

Tuesday, March 26, 2013

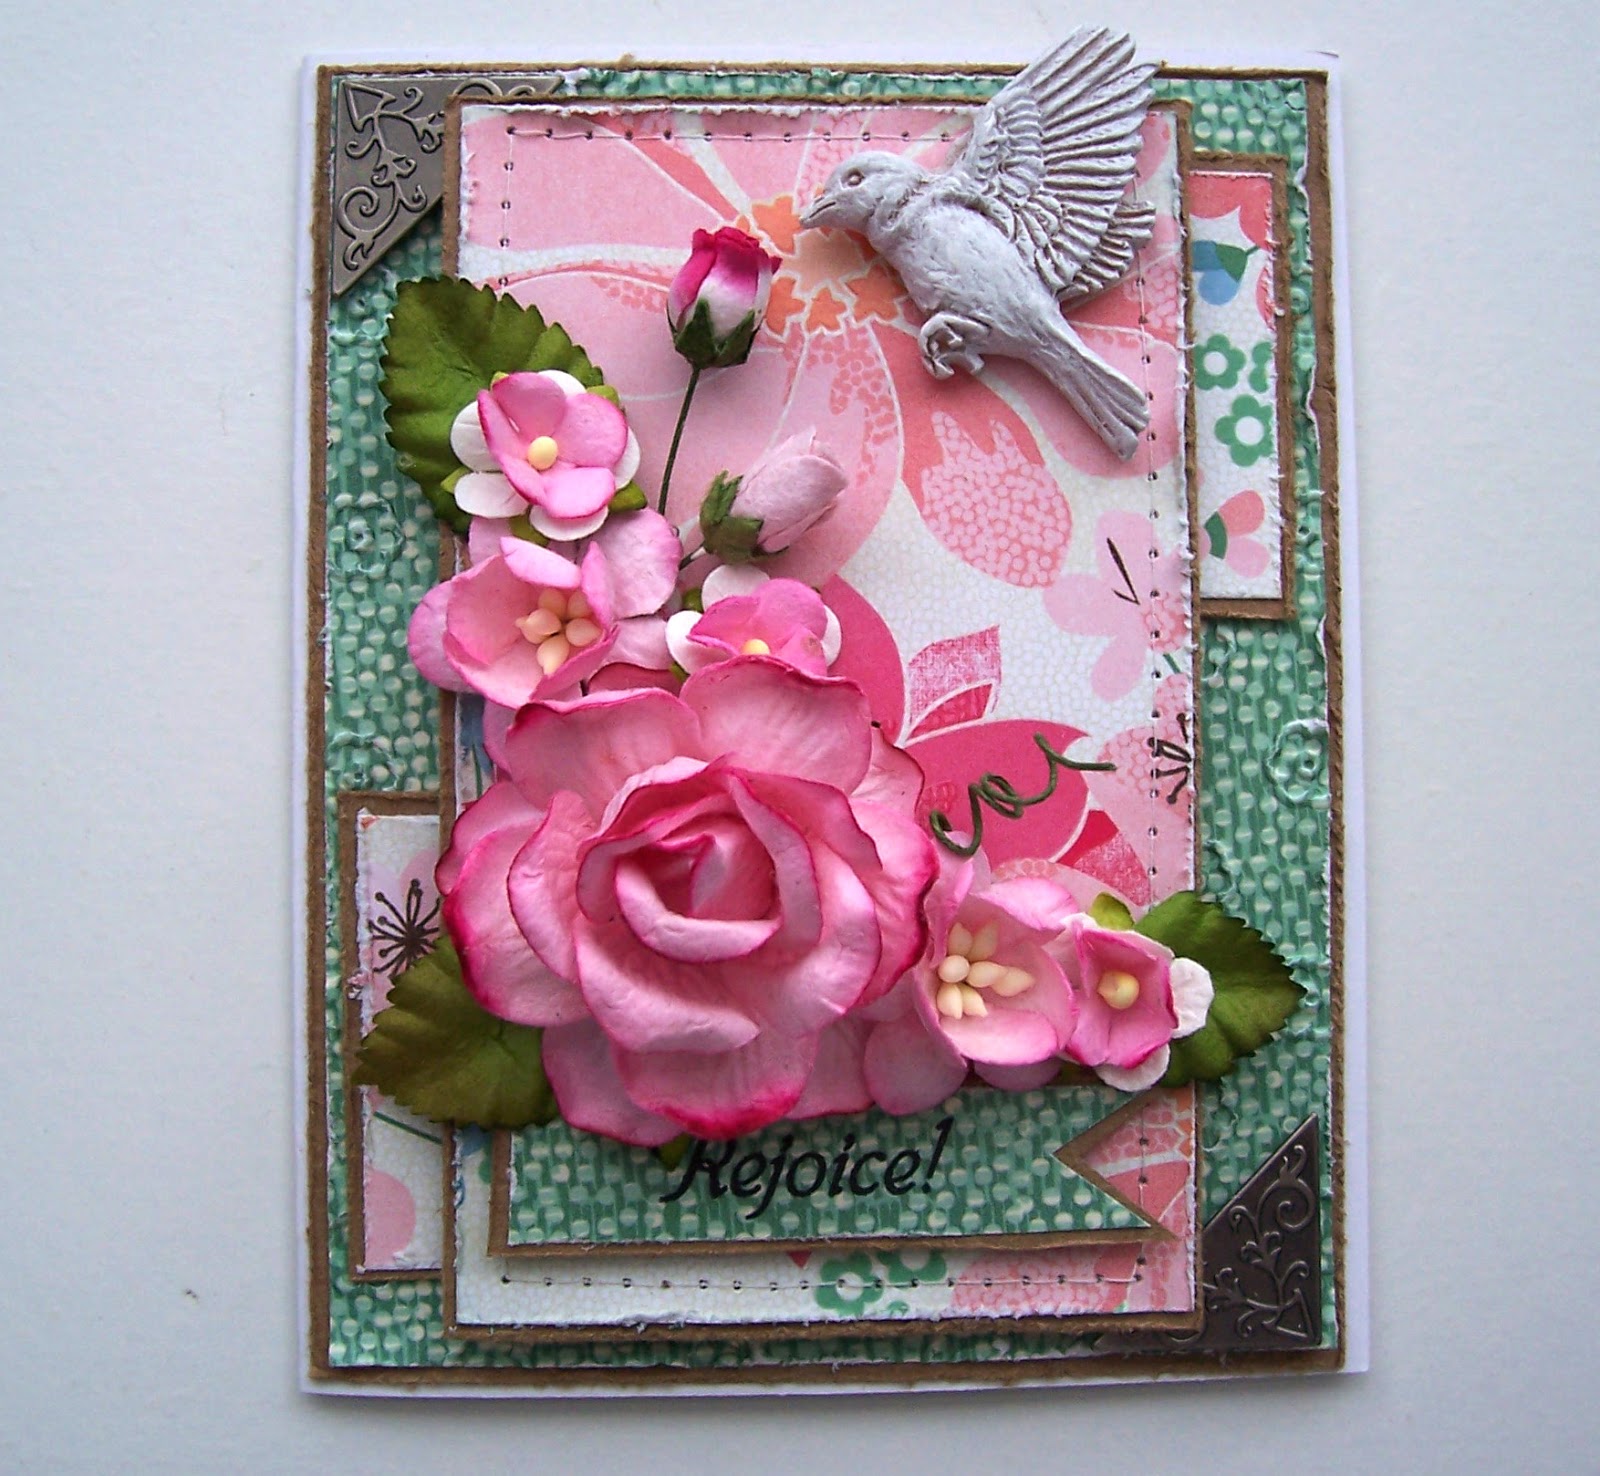
Rejoice... It's Spring Or Is It?

As I'm writing this,
snow plows are cleaning up the three inches of snow we got during the night. It was gorgeous when we first got up at five thirty, but now there appears to be an icy rain falling with dull, grey skies... not so pretty any more.


To brighten my day,
I thought I'd create something springy. I pulled out some random 6x6 papers leftover from a CupCards To Go kit, a sheet of Recollections kraft cardstock and a pre-made white 4x5.5 card base. 


The first green layer is 
embossed with the Cuttlebug folder that came with my machine... such cute, petite flowers. A little machine stitching, some stamping on a pennant layer, a ton of 3-D foam squares, a Prima Shabby Chic bird trinket and Momenta metal corners.


These papers really aren't
my style, and the farther I went with this card, the more I disliked it. I was actually thinking of throwing this one into my Ikea wire mesh waste basket, but held off for the sake of thrift... and the thought that if you (sometimes) work long enough with a project it will turn out alright in the end. I grabbed two boxes of I Am Roses flowers in desperation.


Now my world seemed
to brighten once more... what is it about flowers that just seem to put things in place for me? I can't answer that... I just know it does!
Happy place!!!
I hope you all have a grand day!

I'm linking up at:
Make It Monday - Anything Goes
Sentimental Sundays - Stitching
Simon Says Stamp - Easter/Spring

Thanks for stopping by!
Linda

Monday, March 25, 2013

Mixed-Media Canvas


You have probably seen,
as I have, that lately there is a a trend in mixed-media using a lot of metals, flowers, gesso and sprays originating with the work of Finnabair (Anna Dabrowska). I first became aware of Anna's unique style last year at Creative Jump Start Summit 2012, and have been keeping an eye on her growth in the scrapbooking/mixed-media industry ever since. 
When my daughter
asked me if I would do a canvas for my granddaughter's room, I thought this would be the perfect time to try out this technique.


I first began with
a 12x12 canvas, and quickly realized I was being a bit too ambitious. I ended up with an 8x8, and thankfully they were on sale at 40% off at Michaels.


I put down bits of
torn dress pattern, patterned paper, lace from Hobby Lobby, and a torn paper doily using Mod Podge to adhere, covering the sides as well.


I then did a layer
of molding paste with a Crafters Workshop Confetti stencil.


I printed Katie's picture
(same one I did in b/w for my Christmas mini album yesterday) in a larger size, adhered it to some thin chipboard and fussy cut it. For stability, I made some "pop dots" from medium weight chipboard (two pieces glued together) to attach the photo to the canvas. I chose out some of the embellishments I thought I would use and gave them a coat of gesso. Now I started gluing them all down... lots of layering. After I got things pretty much like I wanted them, I went over everything again with another coat of gesso.


The wood bird and
cage came from Michaels, the flowers are Prima and I Am Roses, the gems are Prima Say It In Crystals, the metal pieces are Momenta and some from my stash.


I covered the Photo 
with a piece of bubble wrap and started spraying... first with Cotton Candy Pink Starburst, then Tattered Rose Glimmer Mist and finally Patina GM. Heat setting between colors. The shimmer on here is amazing.


Here you can see
some of the texture from the doily, pattern and molding paste.


I'm not sure I'll
attempt this again, but you never know. In the end, it all just takes practice.
Have a wonderful day, friends.

I'm linking up at:
 Make It Monday - Anything Goes

Thanks for Stopping by!
Linda
Related Posts Plugin for WordPress, Blogger...